With the continuous changes in the form of home decoration ceilings, there are more and more types of lamps installed in our interior. For example, the lamps installed in previous homes were basically ceiling lamps or chandeliers. But now if you look at it, you will find that there are downlights, spotlights, and light strips. In particular, the appearance of grooves in the ceiling of our home has led to the extensive use of light strips. However, if the light strip is not installed properly, it is prone to failure or flickering problems. Therefore, for the light strips installed during home decoration, everyone should master the specific installation methods. In this article, sunmestriplights will answer the questions about the installation method of the light strip.
(1): The connection of the light strip
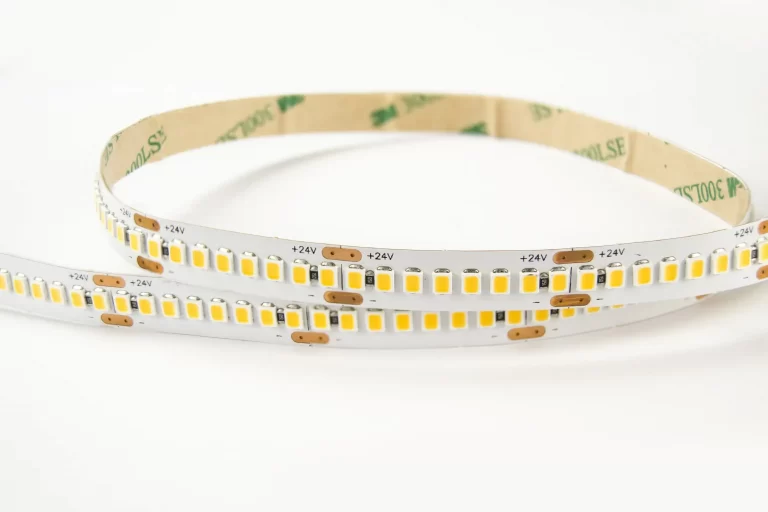
As for the light strip, I don’t know if you have seen it. There are light strips in various sizes according to our requirements. A set of light strips may reach tens of meters, but the short ones are 1 meter or two meters, so the light strips installed in our home must first determine the specific connection of the light strips. The light strips installed in our ceiling are basically installed with rows of light strips. Therefore, follow the steps below to determine the connection of the light strip.
①. Determine the length of the light strip that needs to be installed, and then take an integer according to the installation length to intercept. Like our more common light strips, each unit is about 1m, so when we intercept, we must ensure that this unit will not be destroyed. This requires cutting from the notch so that it does not affect the circuit. If we intercept arbitrarily, some of the lamp beads may not be bright. Therefore, the first step is to determine the length, and then intercept.
②, fixed. Since the light strips used in our home do not consider waterproofing, because the light strips are all installed in our ceiling grooves, the installation method is very simple. For example, most of our more common LED light strips have self-adhesive tapes on the back. We just use its self-adhesive tape to paste it directly into the groove.
③, the connection of the light strip. After we paste the light strip into the groove of our ceiling with self-adhesive glue, it is time to connect the light strip. If we are worried about the movement of the light strip, we can take some double-sided tape to fix it. Finally, press it flat with your hands to fix it. At this time we need to connect the light strip. LED light strips are generally a circuit structure composed of three LEDs in series or parallel, so we just disconnect these parts directly. If there is a joint in the middle, it must be connected by a special soldering method. But try to avoid this situation, try to use the whole section of light belt for installation.

(2): Power connection
①/ The second step in installing light strips at home is actually to install the power supply. Like our light strips, the power supply is usually reserved on the top plate, and then we control it through the switch of the indoor lights, so our second step is to connect the power supply of the light strips. Specifically, it can be completed according to the following steps.
②. The voltage of common LED light strips is basically 12V, so a specific power supply is required for power supply. At this time, the size of the power supply is selected according to the power and length of our light strip. At this time, generally speaking, it is a loop light strip, and it is basically possible to use a power supply. Of course, we can also use a general power supply for control. At this time, we need to purchase a relatively high-power switching power supply as the general power supply, and then connect all the LED lights with input power in parallel. The biggest advantage of this is that it can be controlled centrally. The other is to light up and switch a single circuit. At this time, we choose according to the light belt we installed.
(3): Controller connection
①, Like our common LED light strips, when they are installed, they usually have different controllers. This controller is used to achieve various color transformation effects. For different light strips, the control distance of each controller is different. Like our most common simple controller, the control distance is generally 10~15m, and the distance of the remote controller is about 15~20m, and the longest can reach 30m. For household light strip controllers, a reasonable choice should also be made.
②. Select the suggestion. For the light strips installed in the home decoration, generally we need to look at the length of the light strips. In fact, for a family, it is generally 10~15m, and the longer one is 15~20m, not too long. So just buy the regular matching controller. But if there is really a particularly long light strip, you need to use a power amplifier to break it down.
(4): Matters needing attention
①. We must pay attention to some problems with the light strips installed at home. Because the installation and fixing of the light strip is indeed very simple, but if the installation does not meet the requirements, it may cause problems with the lighting of the entire light strip, especially the heat of the LED light strip, which will burn the position of our ceiling after a long time up. So these are the things we need to pay attention to.
①. The connection distance of the LED strip should be reasonably controlled. For example, the most common 3528 series LED light strip and connection distance can not exceed 20m. If it is a 5050 series LED light strip, the longest connection distance cannot exceed 15m. Therefore, when we install the light strip in our home, we should reasonably control its length according to the light strip we choose.
②. Each light strip must be equipped with a dedicated plug. For example, plugs are equipped with transformers. We can remove the transparent plastic cover during installation, connect it, and then cover it at the end, so that it is not easy to cause a short circuit. The key point for everyone to pay attention to here is that they must not be connected directly with a cover, otherwise it may cause a short circuit.
③ When cutting the light strip, be sure to pay attention to the cut mark. For example, some qualified light strips have cut marks, you can take a look. When we cut the light strip, it is only allowed to cut at the sign, because the wrong or partial cutting may cause the real light strip within 1m to not light up. So before cutting, be sure to see the logo clearly. In addition, pay attention to whether the logo is in the center
conclusion
Regarding the installation of the light strip, the method is actually very simple. Like our home decoration, it can be directly fixed in the groove around the ceiling. What everyone focuses on here is the connection of the light strip. Because many families will find such a problem, that is, the light strip starts to flash after a period of time, and then burns out. And some families found that our suspended ceilings gradually turned yellow. In fact, these were caused by improper selection and installation of light strips. Therefore, in this article, sunmestriplights focuses on explaining the steps of installing the light strip and the matters that need attention. You can simply understand it before installing the light strip.


