Have you recently replaced the power supply for your LED strips, or are you experiencing flickering issues? Try resetting your LED strips to resolve these problems!
To ensure your LED strips function correctly, you may need to reset them from time to time. This process is quite simple: just turn off the power, then turn it back on to reset the LED strips. Many LED strips also come with a “reset button” that you can use for this purpose.
In this comprehensive guide, I will share my experience with resetting LED strips over the years, providing step-by-step instructions. I will also include tips on when you might need to reset your lights and some troubleshooting methods. Let’s get started!

Let’s explore two effective methods for resetting LED strips, which can quickly and conveniently fix your lighting issues. Please read this section carefully and follow these steps to reset your LED strips effectively.
Method-1: Power Supply Method
This power reset method is straightforward and involves four simple steps to reset your LED strips. Here’s how to do it:
Step 1: Turn Off the Power
Before starting, ensure the LED lights are disconnected from the power source. Unplug the cables or turn off the switch connected to the LED strips.
Step 2: Wait for a Few Seconds
Next, check the connections between the LED strips and the power source. Make sure all cables are securely connected to avoid poor connections and potential issues.
Step 3: Reconnect the Power
Now, reset the lights. If you have a remote control, you can use it to reset the LED strips. Alternatively, you can turn the button on and off a few times to allow the lights to reset on their own.
Step 4: Test the Lights
Finally, before reinstalling the lights in their original position, test them to ensure they are working properly. This will save you from the hassle of having to fix them again if something isn’t right.
Method-2: Remote Power Button Method
Many LED strips come with a reset button that allows you to restart them. Here’s how to use it:
Step 1: Connect the LED Strip
First, ensure the LED strip is plugged into the power source. Without a connection to the power, the reset option will not work. Plug the power cable into the socket, being careful not to touch the metal prongs.
Step 2: Locate the Reset Button
Next, find the reset button, which is usually located on the back or side of the device. It may be labeled “Reset” or have a reset icon.
Step 3: Turn Off the LED Strip
Once you’ve located the reset button, turn off the LED strip by disconnecting the power switch or turning it off. Either method works.
Step 4: Remove the Power Adapter
Then, unplug the power adapter from the LED strip. Avoid touching the metal components. If you’re unsure whether the adapter has been removed, check if the LED lights are still on. If they are, the adapter hasn’t been fully disconnected and needs to be unplugged.
Step 5: Hold the Reset Button
After unplugging the power adapter, press and hold the reset button for 3 to 5 seconds. Since the button is often small, you may need to use a pencil or another object to press it.
Step 6: Reinsert the Power Adapter
While continuing to hold the reset button, plug the power adapter back into the LED strip. Ensure the adapter is properly inserted by checking if the LED lights come on.
Step 7: Turn On the LED Strip
Finally, turn on the LED strip by switching it on or reconnecting it to the power source. The LED strip should now be reset and functioning properly.
When to Reset LED Strip Lights
l Connection Issues:
If the LED strip is not properly connected to the power source, it will not function correctly. Always check that all connections are secure and stable before using the lights.
l Flickering Lights:
Flickering lights often indicate that the LED strip needs to be reset. Ensure the lights are turned off before attempting the reset steps.
l Power Fluctuations:
Power outages or fluctuations can cause LED lights to malfunction. To resolve this, reset the lights and check if power issues are the underlying cause.
l Replacing Remote or Batteries:
When replacing the remote control or batteries for your LED strip, you need to reset them. This ensures they resynchronize with the new remote or batteries.
l Controller Issues:
Problems with the controller can also necessitate a reset. The controller may be outdated or defective, or you might need to reconfigure the lighting layout. In such cases, resetting the lights can help restore proper functionality.
l Changing Settings:
If you want to change settings such as intensity or color, resetting the lights can help. This avoids further issues and ensures that changes are applied correctly.
l Part of Routine Maintenance:
Over time, LED strips may develop issues due to wear and tear. Regularly resetting them is part of maintaining their optimal function and longevity.
Troubleshooting–When Restarting Doesn’t Help
If your LED strips are still not working after resetting, here are some troubleshooting steps you can take:
1. Replace the Batteries:
Sometimes, the issue might be with the batteries. To determine if they are the problem, remove the old batteries from the LED strip and replace them with new ones. After replacing the batteries, if you find any damaged bulbs in the strip, remove them.
2. Check for Loose Wires:
Inspect the wires to ensure none are loose. Use wire cutters to remove any leftover old wires, strip the insulation off, and secure them neatly. Before inserting new batteries into the device, ensure there are no loose wires around.
3. Try a Different Power Source:
Another approach is to use an alternative power source. For example, some users have had success replacing standard AA batteries with 9V batteries. You might also consider using AAA batteries instead of AA. If the problem persists after trying different power sources, use a surge protector. Additionally, your LED lights might just need recalibration. Switching between different lighting modes or adjusting brightness settings can often resolve the issue.
4. Clean the Contact Points:
If the strip still doesn’t work after trying these steps, the issue might be with the contact points. Use a Q-tip or cotton swab to clean any dirt or debris from the contact areas. After cleaning, turn the lights on to see if they function properly.
5. Reset the Controller:
If the LED lights are still not functioning, try resetting the controller. Press and hold the reset button for about 3 seconds, then release it and wait for approximately 15 seconds before restarting. You can also connect the LED strip to your phone for easier reset options.
Tips for Prolonging the Lifespan of LED Strip Lights
- Proper installation is crucial for extending the lifespan of LED strip lights. Ensure that the lights are positioned optimally in relation to the controller and power outlet. Avoid excessive bending, as this can damage the circuit board.
- While LED lights generate minimal heat, improper heat dissipation can still affect their lifespan. Do not cover the lights; instead, install them on metal surfaces to help absorb and dissipate heat.
- Using the wrong power source can also impact and shorten the lifespan of LED lights. Use power sources with adequate power and appropriate voltage.
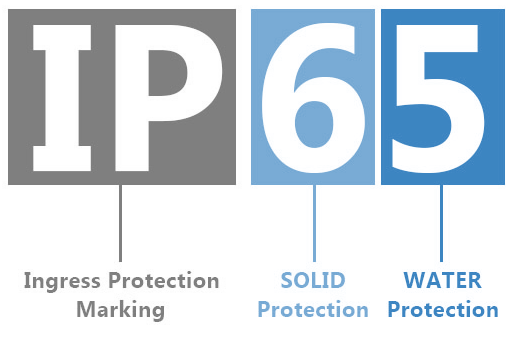
- When installing LED strip lights outdoors or in high-humidity areas, ensure they are suitable for these conditions. For example, LED strip lights with an IP rating are designed to be water and dust resistant.


